
When it comes to prepping the first thing that I think about is food. Maybe that’s because I’m a fatty or because that it is arguably the #1 need to stay alive.
I decided to get a greenhouse for two reasons:
- Supplement and sow seeds in the late winter/early spring and not use up my limited house space.
- Extend my growing season into the late summer/early fall.
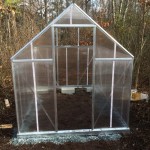
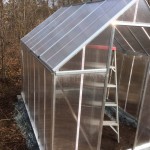
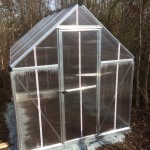
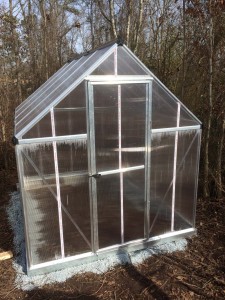
I looked at a lot of different options including building my own and I really liked that idea until I realized I’m no builder and I wanted to make sure I built something that lasts. So I ended up on Amazon, like I do with many purchases, and located the Palram series greenhouses. The Mythos was the size and price range I was looking for out in at 6 ft x 8 ft and around $500 shipped with Amazon Prime two-day shipping.
Poly-Tex Nature 6′ x 8′ Greenhouse
Overview
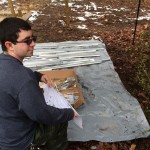
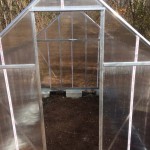
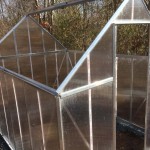
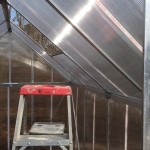
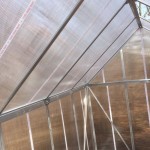
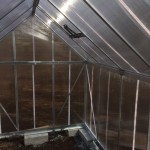
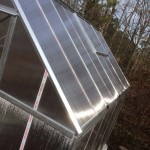
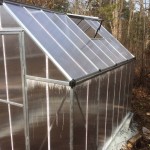
First thoughts when I got the package open was that the polycarbonate twin wall panels that came with the greenhouse were very thin. However on the flip side all the aluminum parts and steel base felt great and very solid. One of the big things I liked about the Mythos greenhouse was that it included extra parts, such as bolts and screws, just in case some were lost in transit. However I’m not sure what happened to the box while shipping but some of my aluminum parts were hanging out of the box and I’m not sure if the blame falls on Amazon or Palram.
Prep, Installation, and Setup
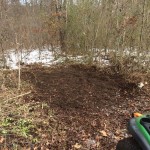
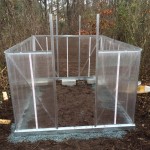
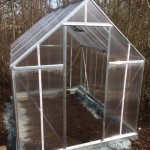
One of the huge learning experiences I took away from this greenhouse, which any good builder or someone who has experience with building knows, is make sure your footing and ground prep work is done correctly. I put the Mythos in my backyard which slopes therefore I had to get some blocks and gravel, which the instructions tell you not to do. I’m 100% sure there is a better way to have done this but bringing in dirt was not an option at this point so I made do with the block and gravel.
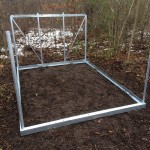
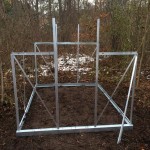
The installation of the greenhouse was relatively smooth, however two people are required to make it easier and faster. The entire system is mostly what I call “snap in” with less snaps and more screws. The screws are placed in the sliders and locked into place with the bolt.
The directions are mostly pictures but as long as you take your time and look over the entire page of instructions prior to trying to be superman and put it all together from memory the process will go smoothly. While this project took about two days, this included clearing the land of trees and underbrush and battling rain therefore having to set up a tent to cover us as well as get the supplies we needed to make sure the surface level. The meat and potatoes, aka getting the Mythos completely put together where so that it is ready for growing, took about a half day.
What I learned
Take your time. Make sure all the parts are there and have a space large enough so that you can space all of the parts in the box so you can easily locate what you need. I used a tarp, which I recommend, to lay out and keep dirt off the parts as well as provide a catch for any dropped small parts like nuts and bolts. It’s hard to tell you what bolts to leave loose and which to tighten down because a lot of the system relies on the bolts clamping parts in place.
What I would do differently
For one I would get the ground level using a more effective method, by that I mean level it off with actual dirt. This was a big issue for me as it would push the polycarbonate wall panels out and make them uneven, duh. So I ran into that issue and fixed it with the blocks and gravel.
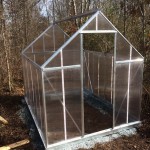
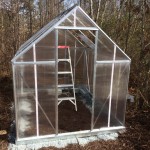
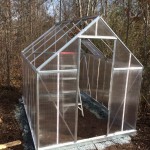
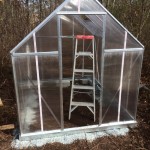
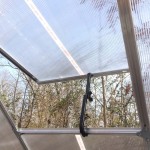
Pictures