
THE BODY HOLLOW
A simple dug-out shelter
Great in the desert, and in places of limited building supplies
Christopher Nyerges
[Nyerges is the author of “How to Survive Anywhere,” and other books. He can be reached at www.SchoolofSelf-Reliance.com or Box 41834, Eagle Rock, CA 90041]
Gimme shelter, we all need it.
And in an emergency, bugging out is a bad idea. Stay home if you can!
But let’s just assume that you can’t stay home. Or at least, you can’t stay in your house because it’s somehow inhabitable. Because all your stuff is there, you should keep a tent handy and pitch a tent in your yard and stay close to home and your neighbors.
OK, so now let’s assume you simply can’t do that. You have to depart. You have to hit the trail or the road and find shelter elsewhere.
Or, you’re lost in the woods and you need a shelter.
There are many shelters to choose, and I’d always, always look for a ready-to-occupy shelter before I’d take the time and effort to construct a shelter completely from scratch.
We’ll talk about that in another article, but ready-to-occupy shelters are everywhere, in the city and in the woods. Man-made or built by nature, there are literally dozens of shelters you can just go find and use.
But let’s say you’re really in a remote area, perhaps in the desert. You’re certain that there’s nothing out there ready to use, and you know you have to construct something.
BODY-HOLLOWS
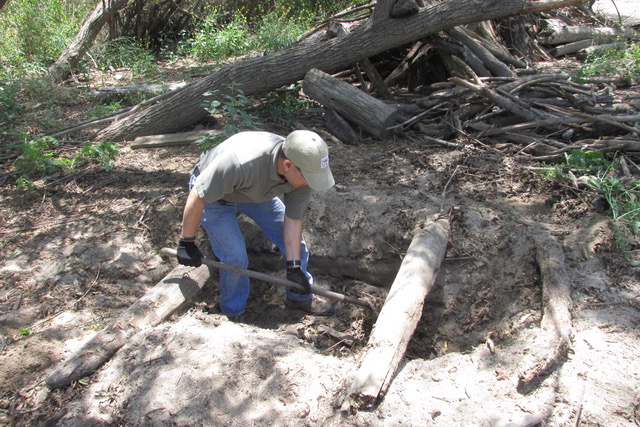
The body hollow is one of the easiest outdoor shelters to construct, especially when there are not a lot of trees and other brush to use. It does require a shovel or some digging instrument. In its simplest form, it is a grave-sized hole several feet deep.
Back in the mid-1970s, we spent numerous weekends in California’s high desert learning survival skills with WTI’s Survival Training School. When we spent the night, we always dug simple body hollows, and its many variations.
As long as there is no chance of rain, the body hollow (sometimes called a scout pit) was an ideal choice because there were few trees to use for such a shelter as a lean-to.
Typically, we dug our body hollows with shovels, but sometimes we used little hand trowels, and sometimes even sticks and bones.
We dug the hole about the size of a grave, assuming one person. Make it larger if two or more will be occupying it. It would be about three feet deep. We lined bottom with lots of grass and as much soft vegetation that we could find.
I have slept in these many times with open tops in the high desert. On the surface in the desert, it’s colder and the wind blows constantly. Sand blows in your face. If you can dig a sleeping hole just a few feet below the surface, it will be just a bit warmer and you won’t have the sand blowing in your face all night. Even without a cover.
Sometimes, we also dug holes in an east-west orientation, so that we could lie in the hollow during the heat of the day and get at least a little bit of shade.
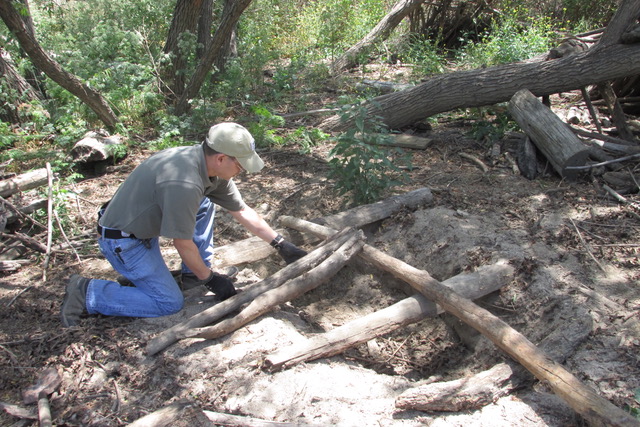
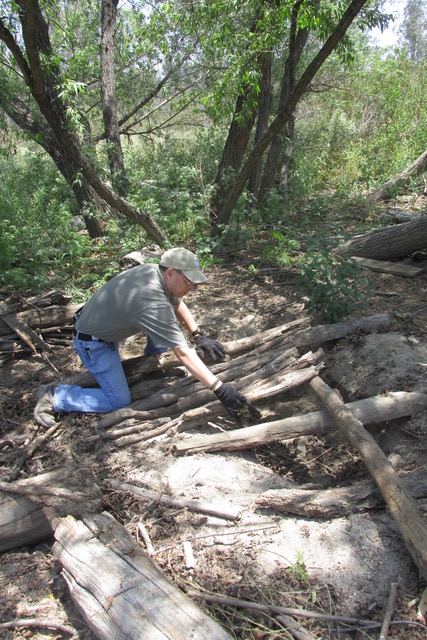
If you have the option, you should build a cover over your body-hollow. Begin by laying poles over the top of the shelter, leaving a space for your entrance. Once you have a “roof” of solid poles, you can begin adding brush, leaves, and successively smaller material.
Over the years, I have spent many nights in such a shelter, and have learned some of the refinements that allow you to spend a comfortable night in the cold. During the classes that I have conducted with the School of Self-Reliance, students have constructed these body hollows that they would then spend the night in. They learned by doing it themselves.
Two common variations of the Body Hollow
First, cover the body hollow with a low lean-to, or simply a “roof.”
Another variation is to build the coal bed or fire pit .
On one of our field trips, the class dug a pit into a sandy area. It measured about two feet deep, three feet wide, and seven feet long. We dug it in less than 30 minutes. We covered the hole from side to side with thumb-thick pieces of willow and mulefat (abundant in the area). As some students filled in this “roof’ with sufficient twigs, others stuffed willow and mugwort leaves into the interior so that we’d be sleeping on a thick layer of leaves, not directly on the ground.
Eventually, we added smaller branches to the top, and piles and piles of leaves. Since this was body hollow was built not far from a trail, we also attempted to camouflage the shelter so that someone walking by would not easily notice it.
Adding pieces of wood to the roof.
The Fire Pit Variation
The fire pit variation takes a little more time, but is well worth the effort on very cold nights. This has been written about by Larry Dean Olsen in his Outdoor Survival Skills book. Ron Hood also demonstrates one variation of this in his woodsmaster DVD on shelter (www.survival.com).
When making the body hollow into a fire pit, I begin with the approximate dimensions given above. I line the bottom with flat rocks, and build a fire in the pit that I allow to burn for about two hours. The rocks and coals are then covered with up to one foot of soil. Then, I may (or may not) build a cover or small lean-to over the top. This depends upon the availability of supplies, the amount of daylight left, and the severity of the cold.
Some years ago, I conducted a weekend survival skills training for the Deer Tribe in the Angeles National Forest. We brought no food, matches, sleeping bags, or tents. Every one built a body hollow and a “roof” over the hollow. Temperatures dipped down to 38 degrees f. that night, and many of the students learned the hard way why it is better to work all day on your shelter than to be cold all night.
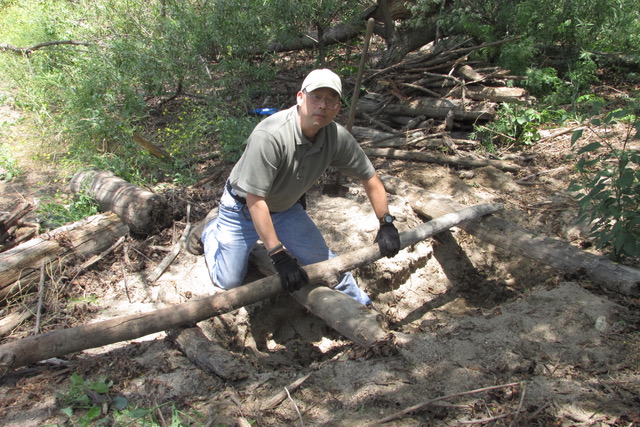
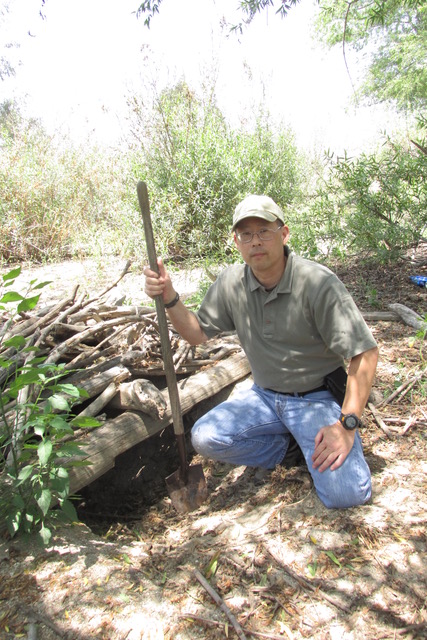
Army veteran Mark Tsunokai secures the main post for the “roof” of the shelter.
One older man who knew what it meant to spend the night outdoors in the cold, worked steadily and slowly all day to construct a deep body hollow. The bottom was thick with bedding and the roof was thick and snug. He even dug steps to get down into it! There were students that night who were awake from the cold, trying to get warm by the fire, but this man was snoring all night!
Remember, the primitive shelters described here are not living shelters. They are what we might call glorified sleeping bags. They are a way to spend the night outside without freezing to death. You don’t build such a shelter with a lot of air space. You build them tight and compact. You make such a shelter only as large as needed, and no bigger.
ALL PHOTO BY CHRISTOPHER NYERGES: